transcribe wav file
How to Transcribe a WAV File Offline with Vibe
To transcribe a WAV file with Vibe, install the current official release, select the WAV recording from your computer, choose the spoken language and a suitable model, run a short test, then review and export the transcript. Vibe keeps the core transcription workflow on your desktop, making it a practical option when you want a free, open-source alternative to uploading WAV audio to an online converter.
Quick answer: WAV to text in five steps
WAV is a container, so the extension alone does not guarantee clean audio or a compatible codec. Preserve the original recording, work from a copy, and test the first minute before committing to a long file.
Download Vibe only from the official GitHub release and confirm the current version.
Select the WAV file, set the correct language, and start with a short representative sample.
Review names, numbers, timestamps, and speaker changes before exporting the final text.
Recommended Vibe workflow
- Keep the original WAV unchanged and create a working copy with a clear filename.
- Open Vibe, choose the local file option, and select the WAV recording.
- Choose the spoken language, model, and speaker or timestamp options needed for the job.
- Transcribe a short sample and check noise, technical terms, names, and speaker boundaries.
- Run the complete file, review the result against the audio, and export TXT, DOCX, JSON, SRT, or VTT as needed.
WAV, MP3, or M4A: which source should you transcribe?
Use the best available source rather than converting only for the filename. A clean original usually matters more than the container.
| Source | Best use | Advantage | Watch for |
|---|---|---|---|
| WAV | Interviews, field recorders, meetings, production audio | Often preserves uncompressed or lightly processed audio | Large files and less common codecs inside the container |
| MP3 | Shared recordings, podcasts, compressed archives | Small and widely portable | Compression artifacts can reduce clarity |
| M4A | Phone recordings and voice memos | Good quality at a smaller size | Codec and metadata behavior varies by recorder |
Do not convert a clean WAV to MP3 before transcription unless compatibility testing shows that a converted working copy is necessary.
Why WAV is useful for transcription
A WAV file can preserve more of the original recording than a heavily compressed copy. That is useful when a transcript depends on quiet consonants, unfamiliar names, overlapping speakers, or technical vocabulary. However, WAV describes a container rather than one single audio encoding. Two files ending in .wav can use different sample rates, bit depths, channel layouts, or codecs.
Start with the cleanest source available. Avoid repeated conversions, automatic volume boosts, aggressive noise removal, or overwriting the master recording. If you must prepare a compatibility copy, document what changed and keep the untouched original for review.
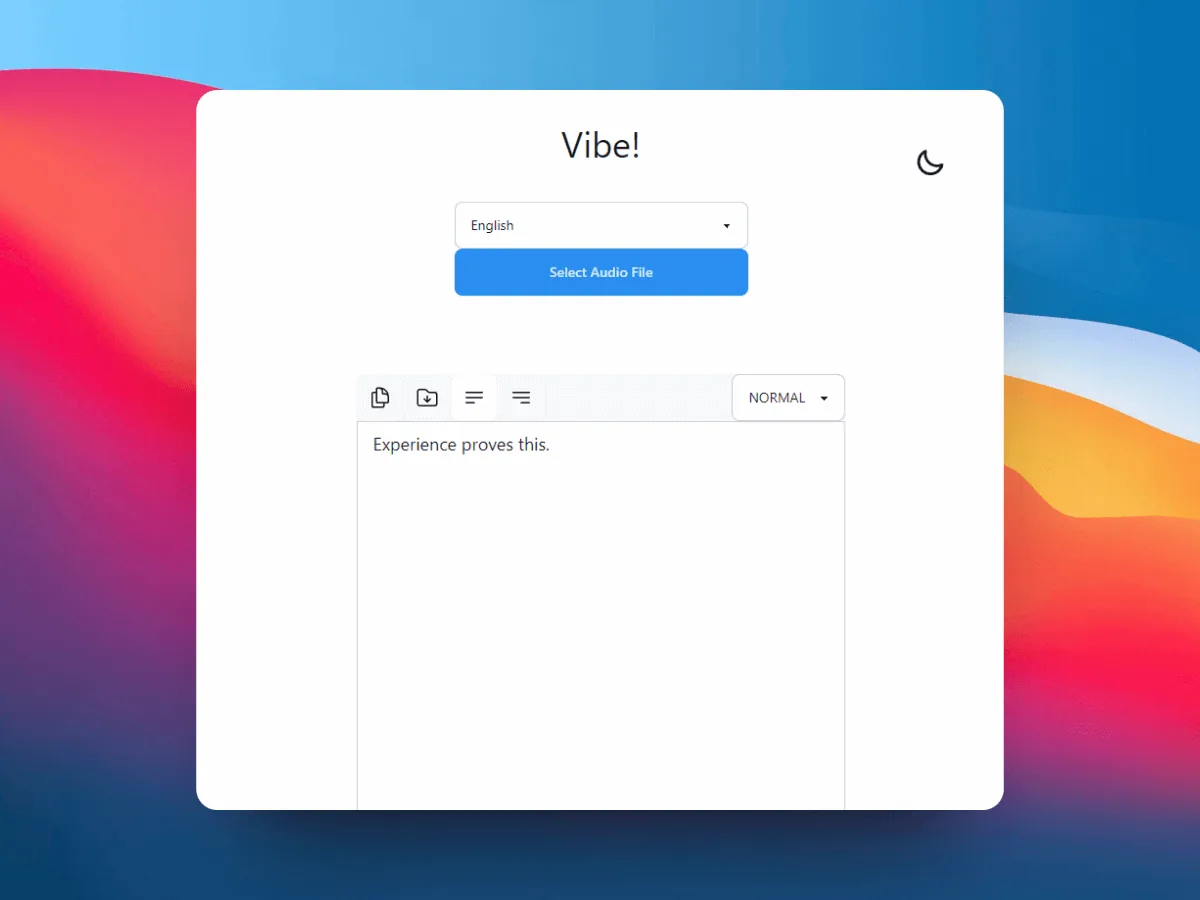
Choose language, model, timestamps, and speakers
Select the language that is actually spoken in the recording instead of relying on the filename or project language. For mixed-language audio, test representative sections and expect additional review. Model choice affects speed, memory use, and recognition quality, so a larger model is not always the best first run on limited hardware.
Enable speaker diarization when the WAV contains interviews, meetings, panels, or calls and speaker turns matter. Treat generated speaker labels as a draft. Enable stable timestamps when you need to locate quotations, create subtitles, or verify difficult passages precisely; timing options may increase processing time.
- Single speaker: prioritize language, model, and clean audio.
- Multiple speakers: add diarization and manually verify every handoff.
- Subtitle work: preserve timestamps and export SRT or VTT.
- Research or legal review: keep the original audio and a reviewed master transcript.
Review the transcript before export
Automatic speech recognition creates a draft, not a certified record. Listen again where the text contains names, dates, amounts, quotations, specialist terms, accents, low-volume speech, or overlapping voices. A short quality-control pass at the beginning, middle, and end can reveal whether the same error pattern repeats through the file.
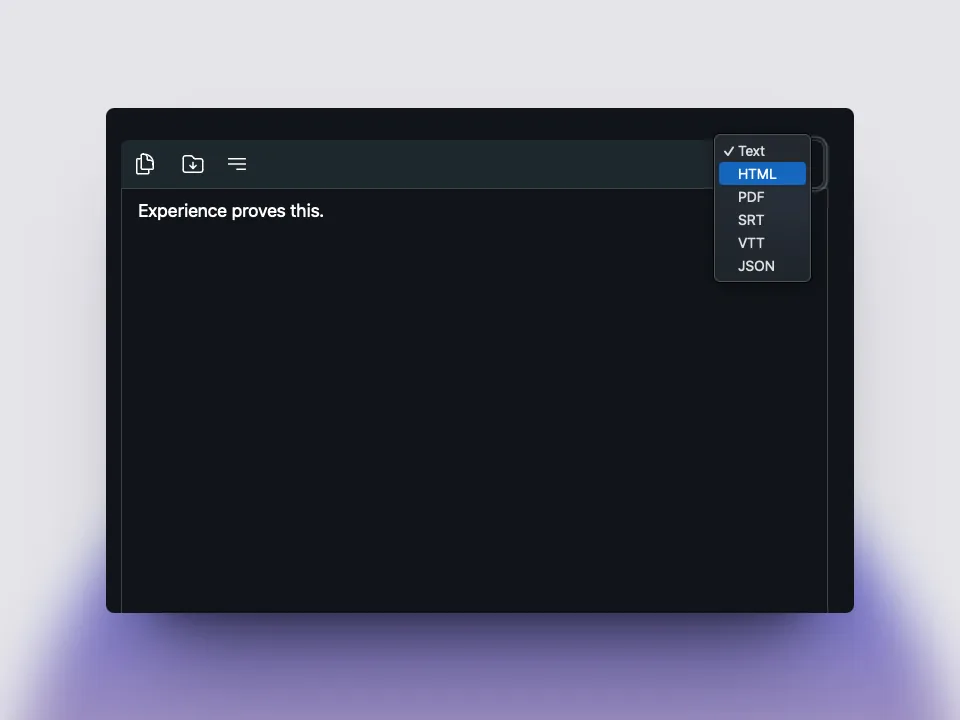
Save a reviewed master before creating summaries or subtitles. Plain TXT is useful for simple editing, DOCX for collaborative review, JSON for structured processing, and SRT or VTT for time-aligned media. Choose the export format for the next task rather than exporting every format without a plan.
Troubleshoot a WAV file that will not transcribe
If Vibe cannot open the file, first confirm that the recording plays normally in a trusted local media player and that the copy is complete. A .wav extension does not prove that the internal audio stream is standard PCM. Corrupt headers, unusual codecs, very high channel counts, or incomplete transfers can cause problems even when the filename looks correct.
Keep the original, then create a separate compatibility copy with a common PCM encoding and retest a short segment. If the transcript is poor rather than failing, check microphone distance, clipping, echo, background music, channel imbalance, and the selected language. Converting the file cannot restore speech detail that was never captured.
- File will not open: verify playback, file size, transfer completion, and codec.
- Processing is slow: test a shorter clip or a smaller model before the full recording.
- Words are wrong: confirm language and listen for noise, clipping, accents, and terminology.
- Speakers are mixed: review diarization labels manually and use clearer source audio when available.
Privacy and file handling
Local transcription reduces routine uploads, but it does not automatically make a workflow confidential. Protect the computer, working directory, backups, exported transcripts, and any copied recordings. Follow consent, retention, workplace, research, or client requirements that apply to the audio.
Vibe's core transcription can run locally after required models are available. Optional summary or AI integrations may use separate local or external services, so review those settings before sending sensitive transcript text beyond the desktop workflow.
Official references
FAQ
WAV transcription questions
Can Vibe transcribe a WAV file offline?
Yes. Select the WAV as a local audio file, choose the language and model, and run transcription on the desktop. Test a short section first because WAV files can contain different codecs and channel layouts.
Do I need to convert WAV to MP3 first?
Usually no. Start with the clean original WAV. Create a separate converted copy only when a compatibility test shows it is necessary, and never overwrite the source recording.
How do I transcribe a large WAV file?
Test one representative minute, confirm the model and language, keep enough disk space, and process the full copy after the sample looks reliable. Split the working copy only when hardware limits or a damaged section make that necessary.
Which WAV settings are best for speech?
A clean recording with clear voices matters more than one universal setting. Common PCM audio is easier to exchange, but preserve the original sample rate and channels until you have tested a separate compatibility copy.
Can Vibe create subtitles from a WAV file?
Yes. Keep timestamps enabled when timing matters, review the transcript against the recording, then export SRT or VTT for subtitle editing.
offline transcription with vibe
download vibe and start with a short local transcription test.
Download Vibe